Access your SharePoint and OneDrive documents from an MS Office app
You will be working in MS Office apps (Word, Excel, etc.) frequently. This post will show you how to easily access your SharePoint and OneDrive documents from inside these desktop apps.
O365 provides online versions of the MS Office apps and makes them available to you through your O365 license. This means that the MS Office Online apps are available to everyone who can use SharePoint and OneDrive. Additionally, you may have the full desktop versions of the MS Office apps installed on your computer. Those of you with the desktop versions installed have the choice to work in either.
This post will walk you through the steps to use the desktop apps to access your SharePoint and OneDrive files. All mentions of Word and Excel in this post refer to the desktop apps.
NOTE: This post is based on using the O365 subscription desktop apps. If you are using MS Office desktop apps through Volume licensing or a box product purchase, then this tutorial will not help you.
Article Index:
Initial Setup:
Sending/Receiving files:
IMPORTANT!
This post requires the following:
- You are using an O365 subscription license of MS Office.
- You are familiar with the AutoSave feature. If not, please review it before continuing.
This tutorial demonstrates the steps in Word, but the same steps can be followed for Excel and PowerPoint.
This tutorial demonstrates the steps with SharePoint, but the same steps can be used with OneDrive.
Opening an existing document in Word

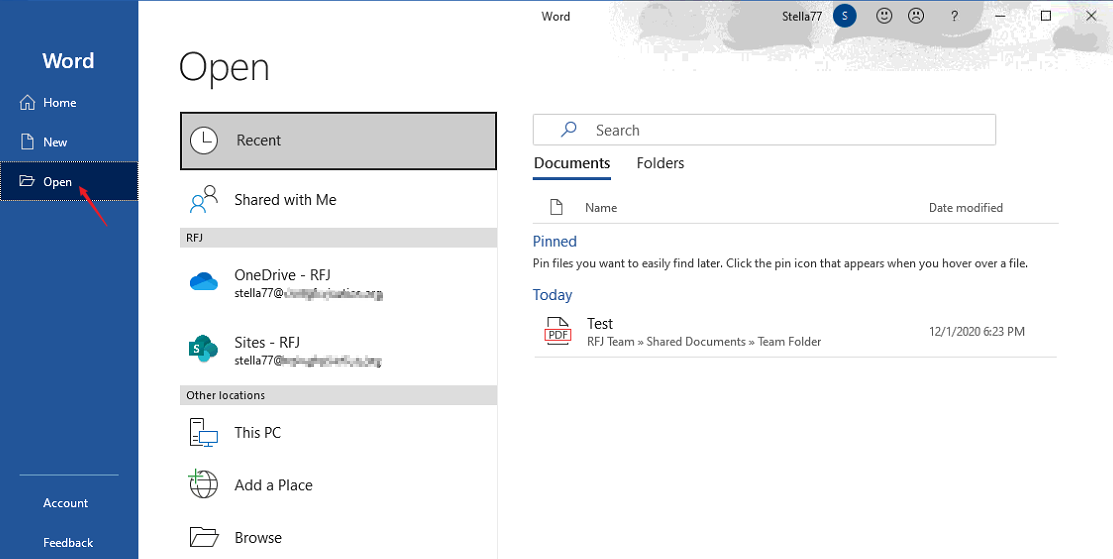
Open the Word app and select Open


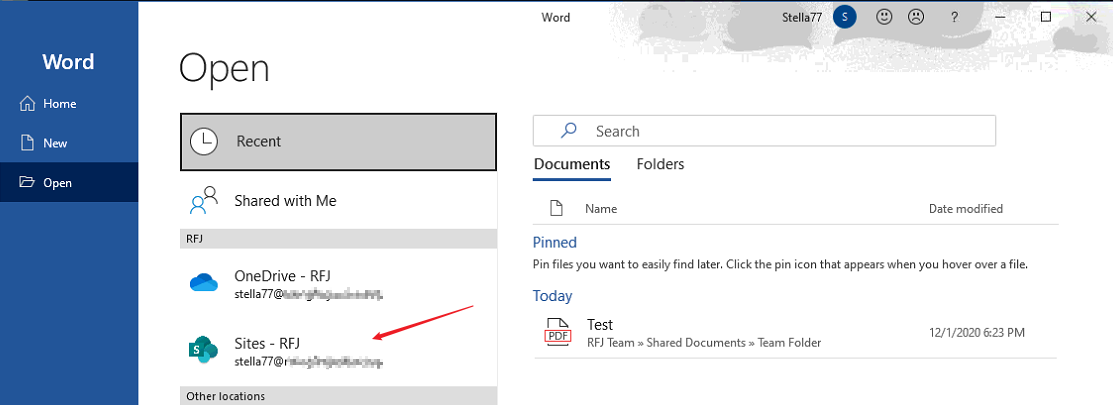
Select Sites (SharePoint)


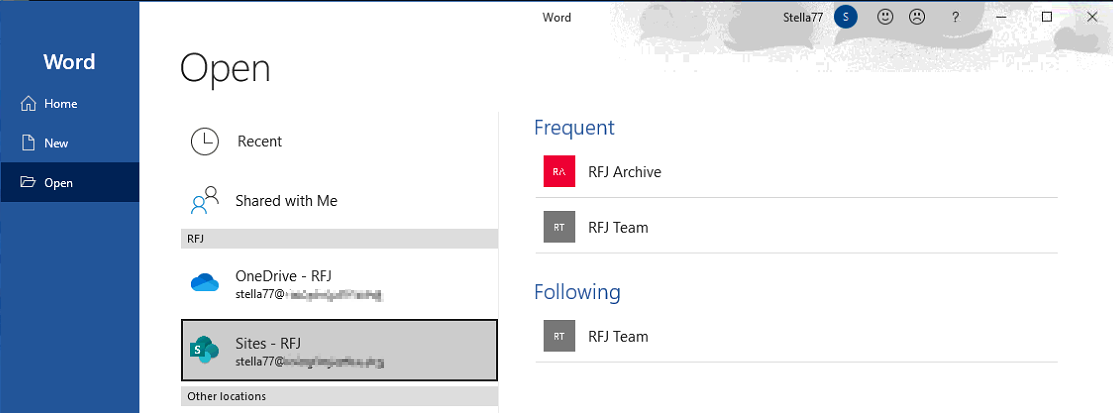
Select the desired Site/Library
Once you have selected that you want to open a document from Sites (SharePoint), you will see the list of SharePoint Sites/Libraries you are following, and those which you frequently visit.
 Select the desired SharePoint Site/Library.
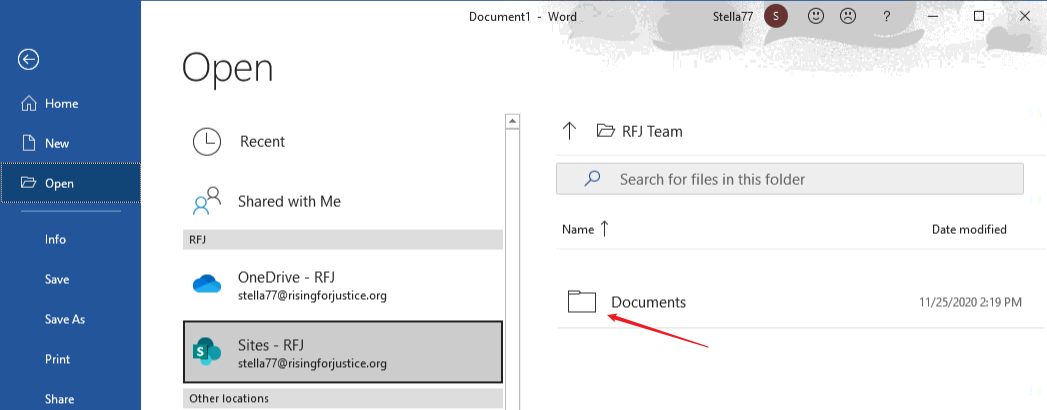
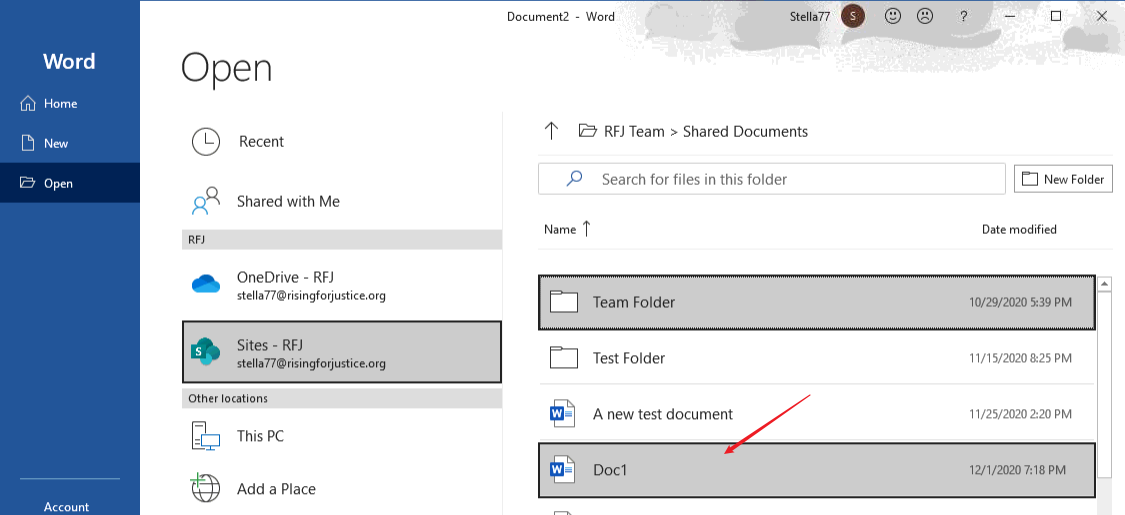
Select the Documents folder
Once you have selected the desired Site/Library, select the Documents folder.


Then drill down into subsequent folders to select the desired document.

The select document is downloaded from the SharePoint site and opened for you to work on it.
Saving a document in Word
These steps can be performed on a new document which hasn’t been saved yet. If AutoSave is engaged on an existing document, then the File > Save or File > Save As options will not be available. Please familiarize yourself with AutoSave if necessary.

Select File


Select Sites (SharePoint)
From the File menu, select Sites (SharePoint)


Select the desired Site/Library
Once you have selected that you want to save a document to Sites (SharePoint), you will see the list of SharePoint Sites/Libraries you are following, and those which you frequently visit.
 Select the desired SharePoint Site/Library.
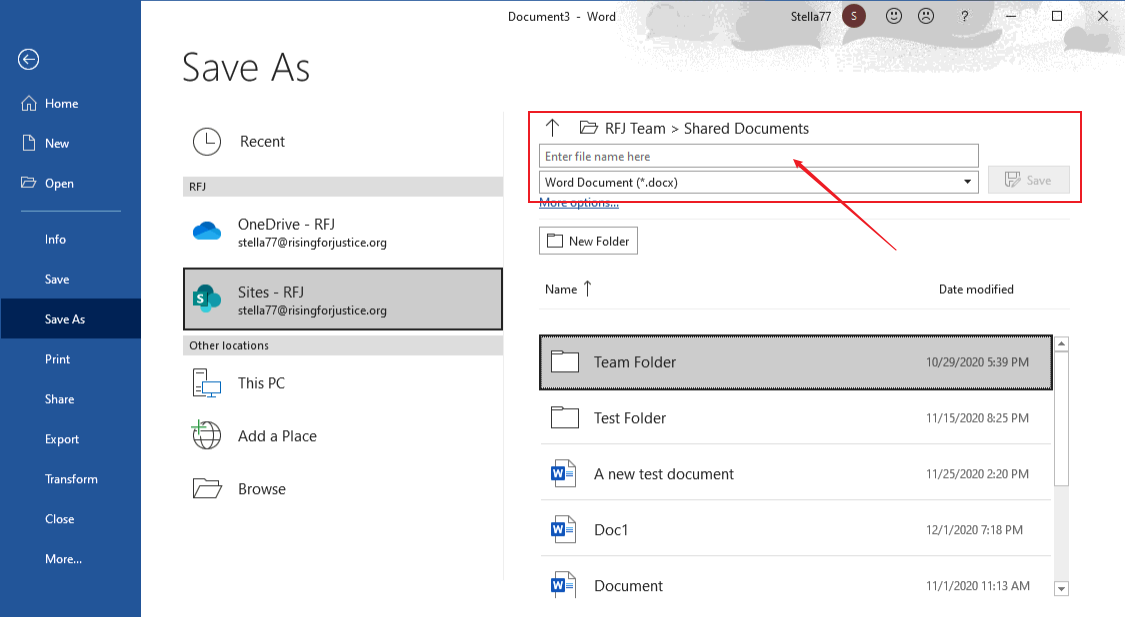
Select the Documents folder
Once you have selected the desired Site/Library, select the Documents folder.


Then drill down into subsequent folders to select the desired folder.
 Enter a document name and click the Save button.
FAQs:
How do I save a new version of a document under a new filename?
As soon as you open the document, select File > Save a copy. This will let you save a copy under a new file name without making changes in the original document.
If you have questions about this, please let us know and we will be happy to assist you.
Take care,




 Select the desired SharePoint Site/Library.


 Enter a document name and click the Save button.

