Send a link to a SharePoint file to a specific external recipient
You have a document in a SharePoint library and you want to send it to an external user (someone outside of your company), and you want to secure the transfer so nobody else can get the document. This article will walk you through the steps to send the document securely.
Article Index:
IMPORTANT!
If someone else in your organization needs access to the document, they should be able to retrieve it through their own access to the library. If they don’t have access to the SharePoint library, then you should discuss this situation with your supervisor or HDF. In this case, the “recipient” may need to be given access to library or the document may need to be moved to a different library. You should not be “sending” SharePoint links or documents to internal users.
Send a link to a SharePoint library document
The following steps show how to send a link to a document in a SharePoint library which is being synced to your Windows 10 computer. You can follow similar steps if you are using a Mac or Windows 11 computer (though the screens will vary slightly). If your SharePoint library is not being synced to your computer, this is not the correct tutorial for you.
If you would like to see how the recipient will receive the document sent this way, the please refer to the article Receive a link to a file (Specific).

Select to Share the document
Locate the document inside the SharePoint library synced to your computer.
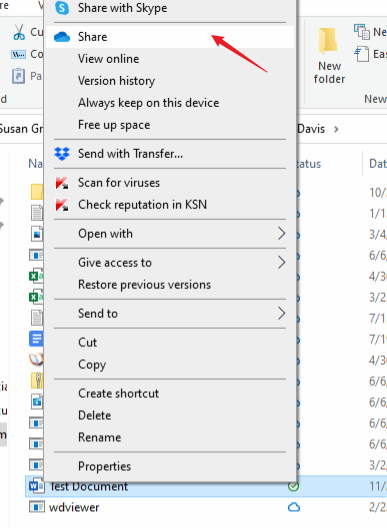
Right-click the document and select “Share”.


Share document pop-up
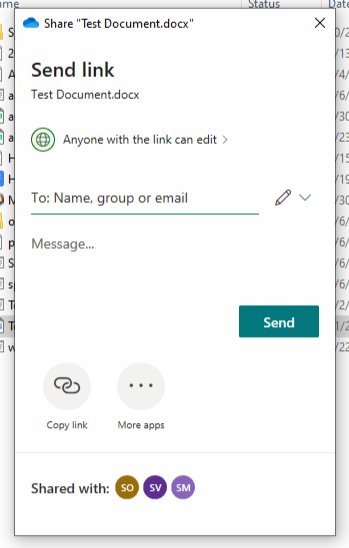
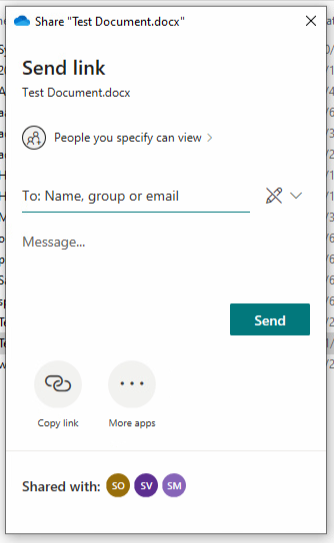
Once you click “Share”, you will get a pop-up window with the following information:
Note, that the default type of link is “Anyone with the link can edit”. This is NOT the correct selection in order to send the document securely.


Link settings
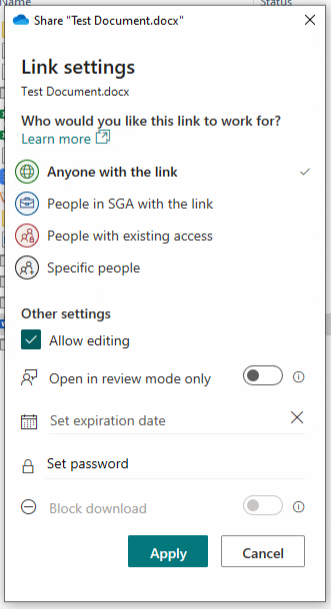
Click “Anyone with the link can edit” in order to change the link settings. This will bring up the following window:
Two important things to note here are:
- “Anyone with the link” is selected (see the check mark to the right of it)
- “Allow editing” is selected (the recipient will be able to modify *your* copy of the document).
In most cases, you will want to change both of these.

First, click “Specific people” to restrict who can access the document.

Change Link settings
Un-Check “Allow editing” to restrict the recipient from modifying *your* copy of the document.
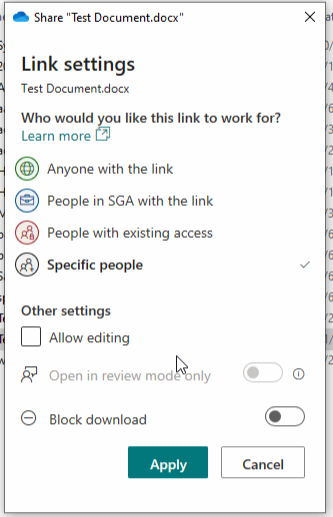
After selecting “Specific People” and un-checking “Allow editing” the pop-up should look like this:

Click the “Apply” button

Enter recipient
After clicking the “Apply” button, you will see the following:

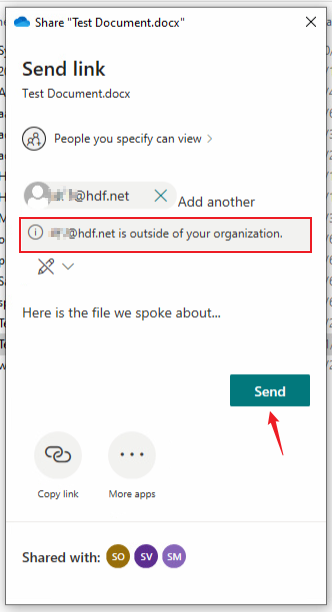
Enter the email address of the external recipient and then press the “Enter” key on your keyboard.

Enter message
After entering the recipient, you will get a reminder that the recipient is external (outside of your organization).
Enter a message to let the recipient know about the document you are sending. In this example, the message is “Here is the file we spoke about…”

Now click the “Send” button. This will send the email with the link to the recipient.
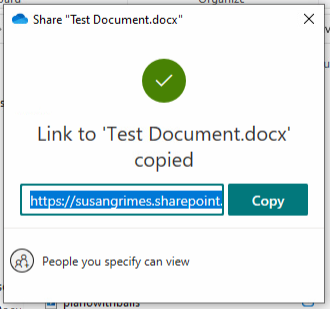
Alternatively, you could instead click the “Copy link” icon at the bottom left. This will generate a Link Code, which you can copy and paste into an email in Outlook. Clicking the “Copy link” icon will generate this page:

From the above page, you can click the “Copy” button and then paste the link into an email in Outlook (or any other email program).

Finished
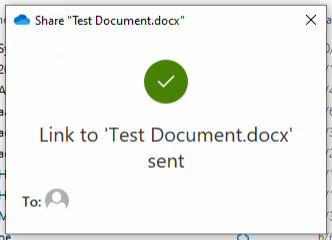
After sending the email, the pop-up will display the following finished message:

If you have questions about this, please let us know and we will be happy to assist you.
Take care,


