Syncing your O365 email on your Android device using the built-in email app
Your device running the Android OS comes with the gmail app. This built-in app can be used to easily sync your O365 email with your device.
The steps below show you how to use the automated way to connect your Android device to your O365 account. If you have difficulty with it, please follow this link and then scroll down to the heading “Manual setup in the Gmail app”.
Note: You may also want to consider downloading the free MS Outlook app from the Play Store to use instead of the built-in gmail app.
Access O365 email from your device
Choose your device
Android – Gmail app
More reference articles
Set up O365 email on Android devices
![]()
Your results may vary…
The apps referenced in this article come built-in on all Android OS devices. But they may look different depending on your version of Android, your phone carrier, and/or your brand of device. So these directions may not exactly match the options you see. Use these steps as a guide or consult the manufacturer’s help for your particular device. You can also reach out to HDF for support.
Before you begin, please update the Gmail app on your device to the latest version. To do so, open the Google Play Store app on your phone or tablet, type “Gmail” into the search bar and then select Update once it finds the app. If the update option is not available, then you already have the latest version.

Open the Gmail app
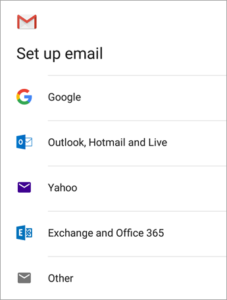
Tap the menu icon in the upper left corner > Settings > Add account > Exchange and Microsoft 365.
Important: Do *not* choose “Outlook, Hotmail, and Live” unless you want to sync email only and not calendar/contacts.

Enter your credentials
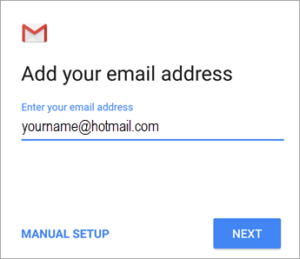
Enter your full email address and tap Next.

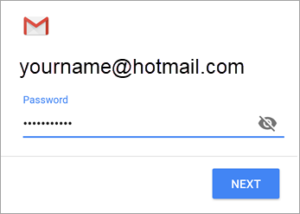
Enter your password and tap Next.
Note: You can click the Eye icon at the right to view the password as you type it (unless someone is looking over your shoulder).


Follow steps for your account
You may be prompted to select your work or school account. If so, please select “work”.
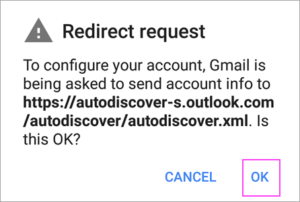
If you see the following Redirect request message. If so, please tap OK.

On the Incoming server settings screen, change your server to: outlook.office365.com

Security
Follow any prompts you may get for security or device permissions, sync settings, and more.

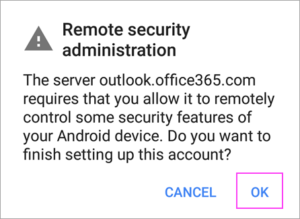
You may also be asked to confirm Remote security administration and approve additional security measures. In this case, choose OK or Activate.
NOTE: The security measures allow the administrator of your O365 account to remotely wipe the O365 data from your device. This is important in case your device is lost or stolen.

Open your inbox
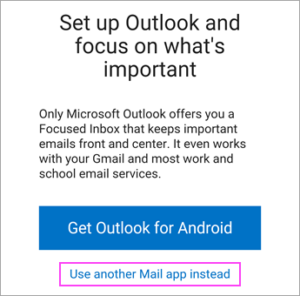
Open your inbox. If you see an email that says “Action Required to Sync Email,” open it and tap Use another Mail app instead.

If you don’t see this message and emails are syncing, skip this step.

Look for new emails
Pull down the Android notification bar by swiping down from the top of your screen.

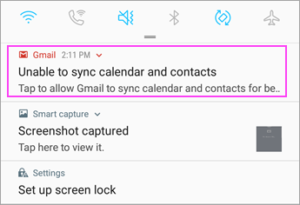
If you see a notification that reads “Unable to sync calendar and contacts,” tap it. Then tap Allow to give access and you’re done!

Confirm your calendar and contacts are syncing
Open your built-in calendar and contacts apps to confirm that this data is syncing as well.
If all else fails:
If the steps above do not work for you, you may need to manually setup your O365 account. To do so, follow this link and then scroll down to the heading “Manual setup in the Gmail app”.
If you have questions about this, please let us know and we will be happy to assist you.
Take care,


